DermEngine Integration for MedicalDirector
This page explains how to set-up the DermSync software to sync patient demographic data from the MedicalDirector software to DermEngine.
While using this software, patients on MedicalDirector will be transferred to the DermEngine platform. On DermEngine, images and lesions can be added to each patient.
Requirements:
- A Windows or Mac machine with MedicalDirector installed
- The user needs to have permission to install DermSync
Installation Steps:
- On the server* computer, download the integration software (DermSync)
For Windows
DermSync-setup-service.msiFor Mac 64 bit (x64)
DermSync.app*Not recommended for terminal servers
Learn about the differences by clicking here - If you are using a Windows Machine, install DermSync on your machine (Default Folder: C:\Program Files (x86)\DermSync\).
Users need to have write permissions on this folder.
Note: We recommend installing DermSync for all users.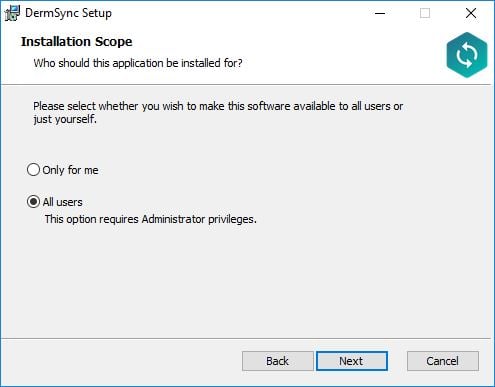
- Double click to run the DermSync application
- Enter your DermEngine credentials including your email and either your password or access key.
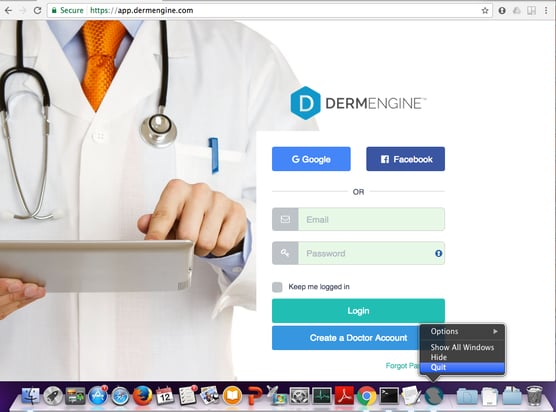
If you don't already have an account, visit https://app.dermengine.com/ or download the mobile app.
To learn how to create an account click here.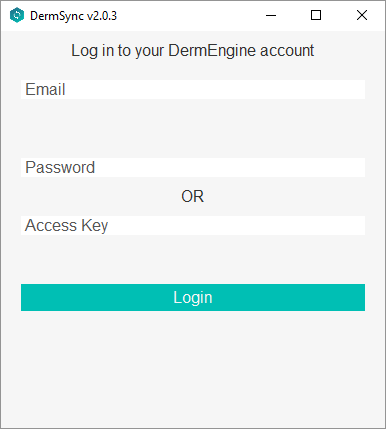
The access key can be retrieved on DermEngine under the Account menu. - Select "Medical Director" from the drop down list
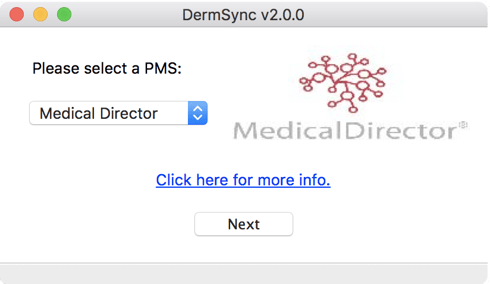
- Enter the database settings.
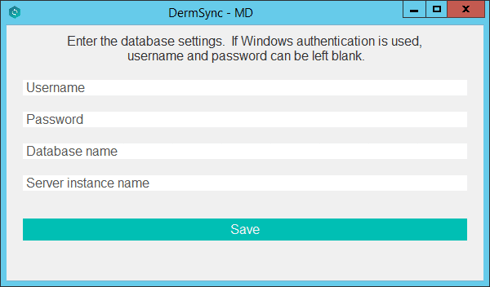
Enter SQL Server Username/Password. If Windows user authentication is used to access the database, then Username/Password should be left blank.
Enter the database name, it usually has the name "HCN"
Enter the server instance name. It is usually in the format "SERVER_NAME\INSTANCE_NAME".
Click Save - From Settings, select Run from startup to ensure the application will restart after the computer reboots.
Transfer Patients:
- Patients will be sent to DermEngine when added to the waiting room (PracSoft), when the clinical visit starts (MedicalDirector), and when the patient demography is saved.
- On PracSoft, add a patient to the waiting room.

- On MedicalDirector, open a patient's clinical record to start the patient visit. The doctor assigned to the patient is the logged in doctor.
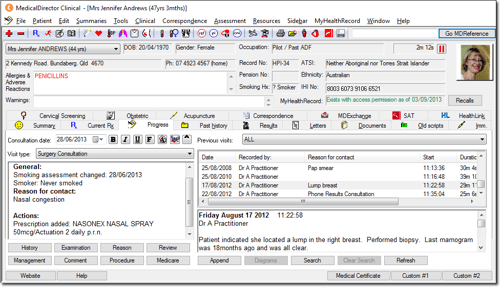
- On PracSoft or MedicalDirector, edit the patient demography.
There are 3 optional filters that can be set up. For example, if you apply filters for both providers and appointment types, then the patient will only sync if both conditions are met.
- Filter by providers
- Filter by appointment type
- Filter by custom field
To filter by Providers:
- To filter the export based on the providers to limit the patients sent to DermEngine (By default all patients from all doctors will be transferred):
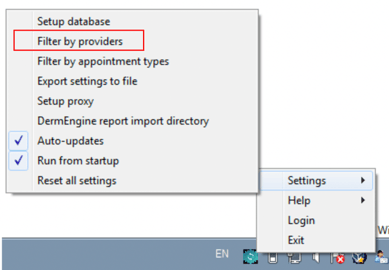
- Click the application icon in Taskbar (by default at the bottom right of the screen)
- Select Settings and then Filter by providers
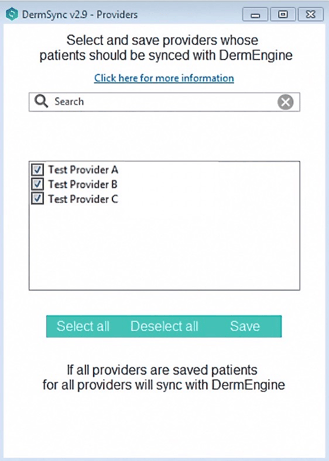
- From the given list, select providers whose patients you would like to transfer to DermEngine.
To filter by Appointment Type:
- On MD Pracsoft, click on Appointment Book icon
 , in the window that pops up. On the top click on 'Setup' followed by 'Appointment Types'.
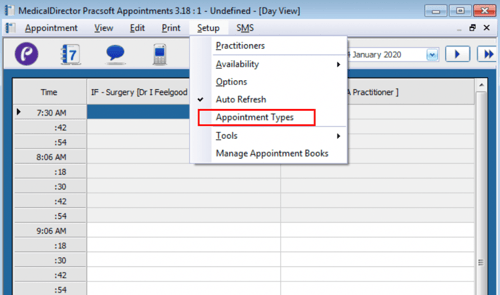
- For the appointment filter in DermSync to be useful you must click 'Save' in the window of appointment types that shows up. In this window you may also edit appointment types.
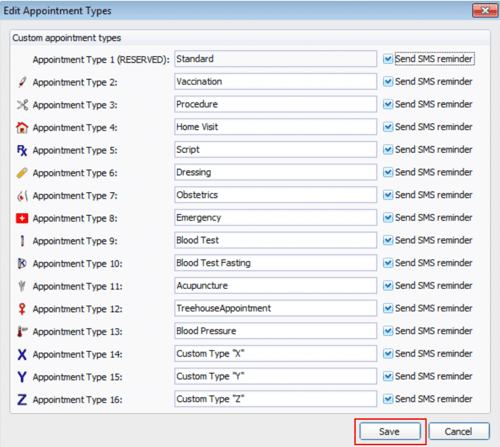
- On DermSync, click the application icon in Taskbar (by default at the bottom right of the screen).
Select Settings and then "Filter by appointment types"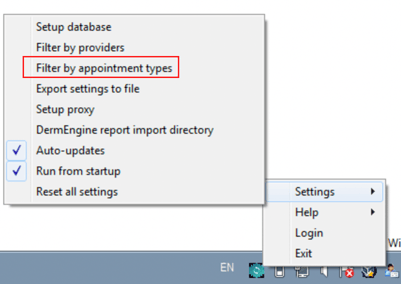
- Select from the list, appointment types of patients you would like to transfer to DermEngine.
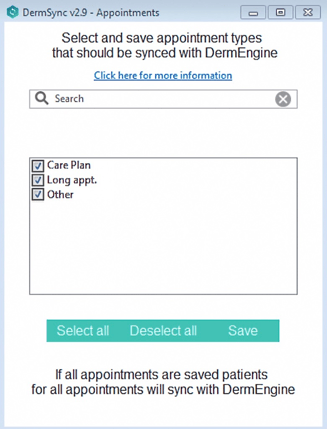
- Patients who have had this appointment type at their most recent appointment will be synced when opened
- On DermSync, select Settings and then Filter by custom field.
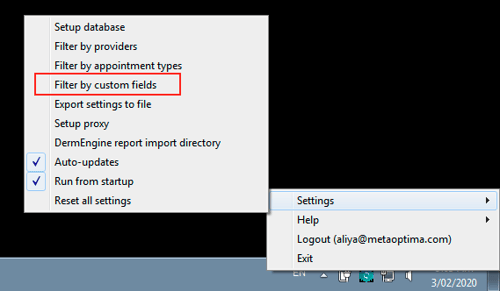
- Check the box to use the custom filter.
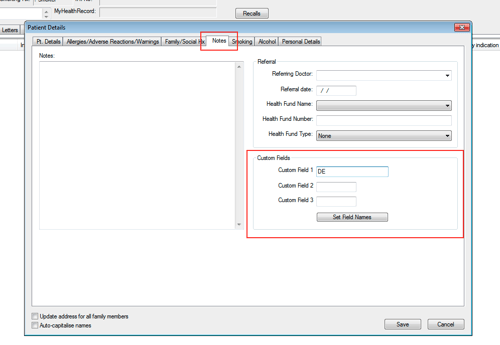
- From Patient > Details, use the text "DE" in the custom fields
Import Timeline Reports to Medical Director:
(Requires DermSync v2.8 or higher)Setup
- Create a folder that will be used for patient transfer files and allow write access for any accounts using Medical Director (you can change permissions by right clicking folder and selecting properties)
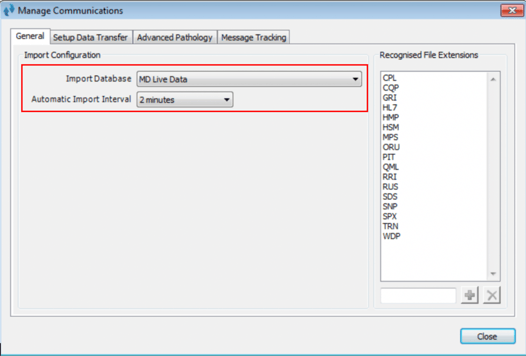
- Log into Medical Director Client and navigate to import settings via Tools > Manage Communications . In the General tab, change ‘Import Database’ to MD Live Data and set import interval to preference (eg. 2 minutes).
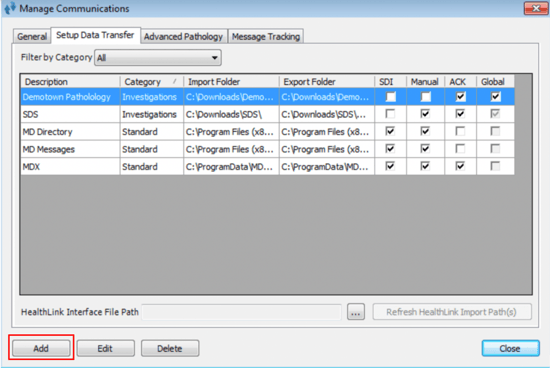
- In the Setup Data Transfer tab, click “Add”
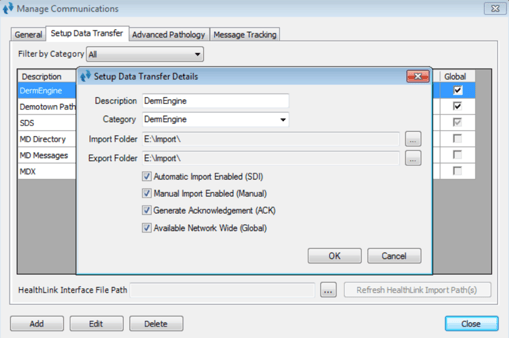
- Enter 'DermEngine' into description and category fields.
Click ‘…’next to Import Folder and Export Folder and search for the folder you created. Check off all remaining boxes.
- Click close and select yes in follow-up prompt to save settings.
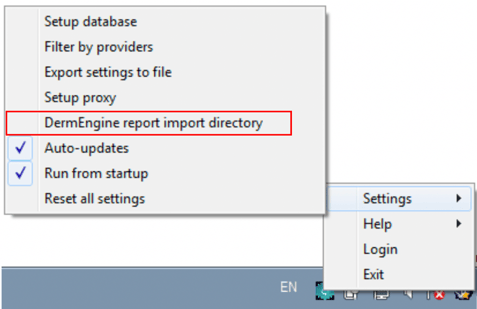
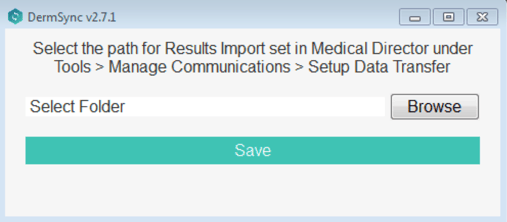
- Next, set up on DermSync. Click on the taskbar icon, then select “DermEngine report import directory”. Select the same path as you configured in previous steps with medical director.
Export
-
-
- On DermEngine web, create a Timeline Report. Press the button to 'Print Report' and 'Export to Medical Director'.
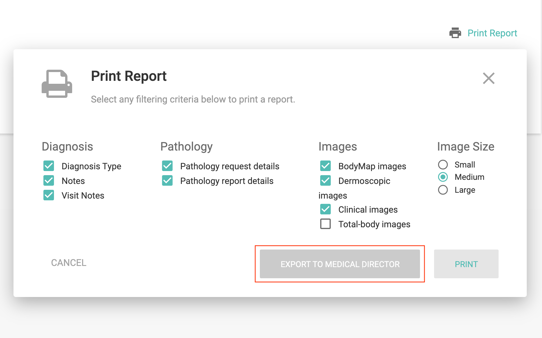
- The folder will be synced at every interval selected in the set up steps. To manually download reports from exported reports from DermEngine into Medical Director close all patients then go to Correspondence > Download
- To view imported reports and assign them to patients go to Correspondence > Check Holding File… where you will be prompted to select the practitioner(s) you want to examine results for and then be presented with the Holding File

- On DermEngine web, create a Timeline Report. Press the button to 'Print Report' and 'Export to Medical Director'.
-
Updating DermSync:
- When a new version of DermSync is available, the message below will pop up.
By simply clicking "Update", DermSync will download the most recent version and restart.
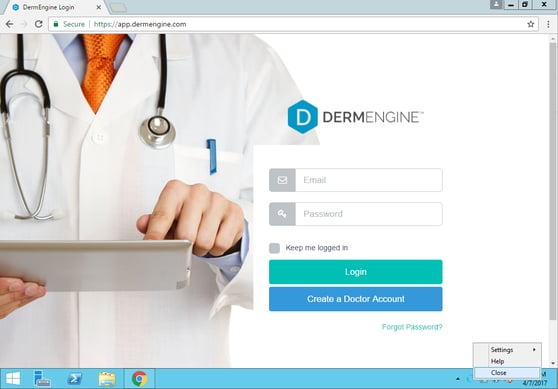
- If you are using DermSync v1.x, please make sure to first close the app by right clicking on the icon in the bottom right corner and selecting "Close".
FAQ:
The list of fields transferred is: First name, Last name, Date Of birth, Gender, Health number (Medicare), Address, Province, City, Postal code, Phone number, Email

