
DermEngine Integration for myPractice
This page explains how to set-up the DermSync software to sync patient demography from the myPractice software to DermEngine.
While using this software, patients exported on myPractice will be transferred to the DermEngine platform. On DermEngine, images and lesions can be added to each patient.
Requirements:
- A Windows or Mac machine with myPractice installed
- The user needs to have permission to install DermSync
Installation:
- On the server* computer, download the integration software (DermSync)
| For Windows DermSync-setup-service.msi | For Mac 64 bit (x64) DermSync.app |
*Not recommended for terminal servers
For Windows
DermSync-setup.msiLearn about the differences by clicking here
DermSync-setup.msiLearn about the differences by clicking here
- If you are using a Windows Machine, install DermSync on your machine (Default Folder: C:\Program Files (x86)\DermSync\).
Users need to have write permissions on this folder.
Note: We recommend installing DermSync for all users.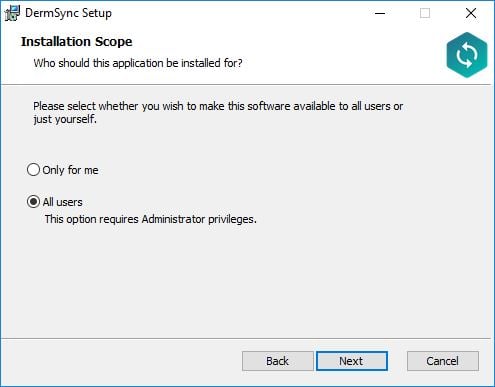
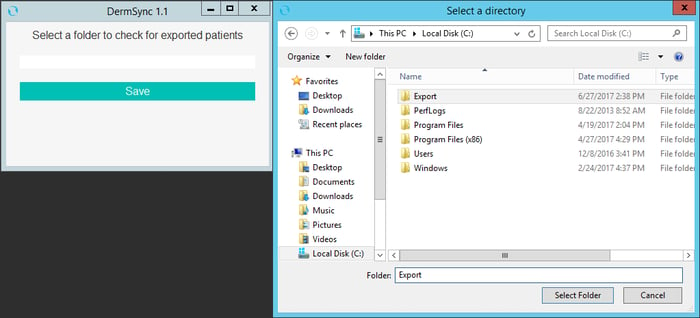
- Create a folder that will be used for patient transfer files.
- Double click to run the DermSync application or right click and select "Open".
- Enter your DermEngine credentials including your email and either your password or access key.
If you don't already have an account, visit https://app.dermengine.com/ or download the mobile app.
To learn how to create an account click here.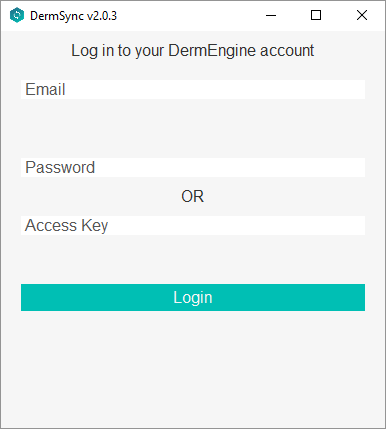
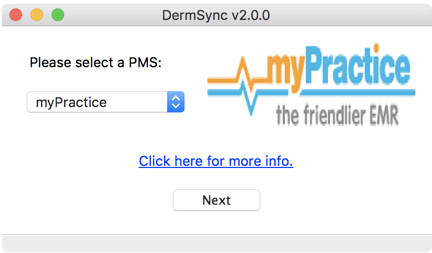
The access key can be retrieved on DermEngine under the Account menu. - Select "myPractice" from the drop down list
- In the DermSync application, open the folder created previously for patient transfer files. The same folder must be used for all future patient extracts.
- Once you have successfully logged in, any patients extracted on myPractice will be available on your Patient List on DermEngine and the mobile apps.
Extract Patient:
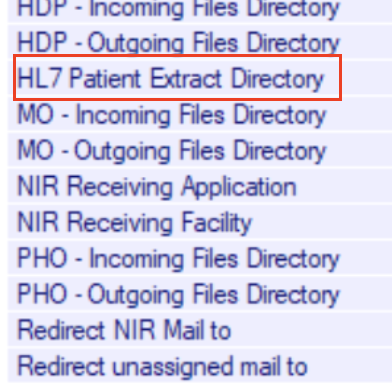
- In myPractice, set the "HL7 Patient Extract Directory" to the same folder set up on DermSync.
- In myPractice, under the "Tools Menu", select "Downloads", then "Extract Patient Details as HL7".

- Search for the patient on the patient list and press OK.
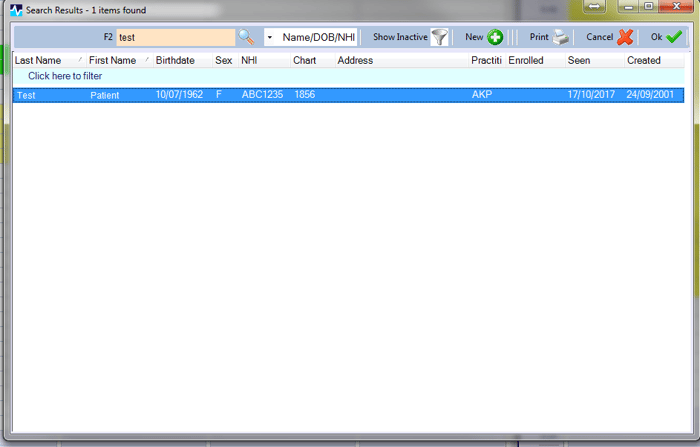
- Save this file to the folder set before. You should see a confirmation message.
- For future patients you can continue to save over the same file.
Import Timeline Reports
(Requires DermSync v2.31 or higher)
Setup
- On myPractice, find the path for the Healthlink incoming HL7 folder, for example: "\\SERVER\HLINK\HL7_in\RSD02NZ\"
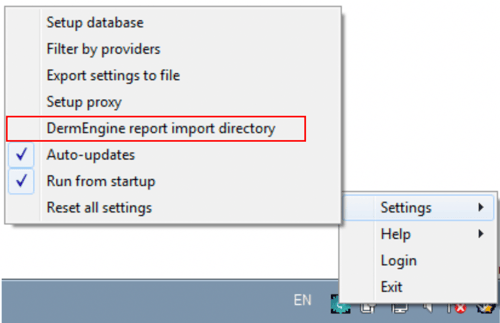
- On DermSync, click on the taskbar icon, then select "DermEngine report import directory". Select the same path in DermSync.
Export
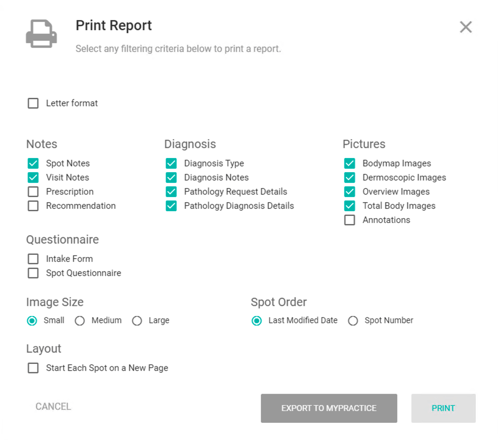
- On DermEngine web, create a Timeline Report. Press the button to Print Report and Export.
- DermSync will save the report to the selected folder. When myPractice imports the report, the file will be deleted automatically.
- On myPractice, the report will be available under Mail.
Updating DermSync:
- When a new version of DermSync is available, the message below will pop up.
By simply clicking "Update", DermSync will download the most recent version and restart.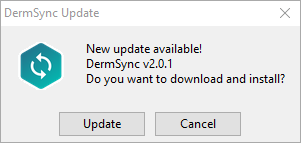
- If you are using DermSync v1.x, please make sure to first close the app by right clicking on the icon in the bottom right corner and selecting "Close".


FAQ:
The list of fields transferred is: First name, Last name, Date Of birth, Gender, Health number (NHI), Address, Province, City, Postal code