
Image Uploader to DermEngine
This page explains how to set-up the DermSync software to sync images to DermEngine.
While using this software, images will be transferred to the DermEngine platform. On DermEngine, images can be assigned to a patient and lesion.
Steps:
- Download the integration software (DermSync)
| For Windows DermSync-setup.msi |
For 64 bit (x64) Mac DermSync.app |
- If you are using a Windows Machine, install DermSync on your machine (Default Folder: C:\Program Files (x86)\DermSync\).
Users need to have write permissions on this folder.
Note: We recommend installing DermSync for all users.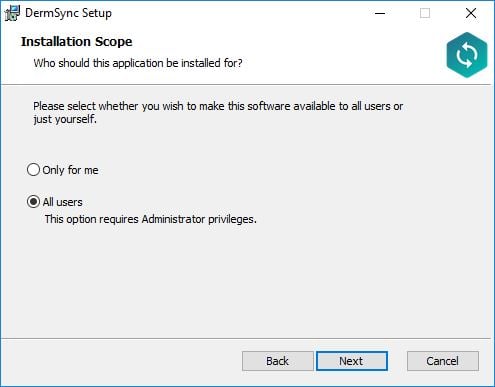
- Create a folder that will be used for image transfer files or use the camera's default folder.
- Double click to run the DermSync application or right click and select "Open".
- Enter your DermEngine credentials including your email and either your password or access key.
If you don't already have an account, visit https://app.dermengine.com/ or download the mobile app.
To learn how to create an account click here.
The access key can be retrieved on DermEngine under the Account menu. - Select "Quick Snap" from the drop down list

- In the DermSync application, open the folder set in Step 2.

- Once you have successfully logged in, any images added to the folder will be available under Quick Snap on DermEngine and the mobile apps.
- Uploaded images can be assigned to a patient under the "Patients" tab.
Select a lesion to assign the images to.
Click the "Upload Image" button, then "From Quick Snap".

Updates:
- If you are updating DermSync, please make sure to first close the app by right clicking on the icon in System Tray and selecting "Close".
